As one of the most frequently used fixtures in your mobile home, the bathtub is an essential part of your daily routine. However, due to constant use and exposure to water, your mobile home bathtub can become damaged over time. If your bathtub is leaking, has cracks or chips, or is simply outdated, it may be time for a mobile home bathtub repair.
In this article, we’ll cover some tips and techniques for repairing your mobile home bathtub, as well as the tools and supplies you’ll need to get the job done.
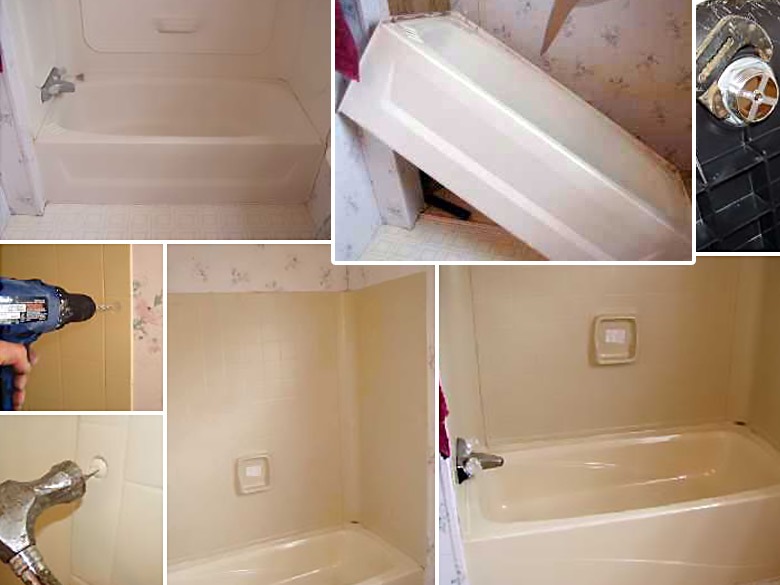
Assessing the Damage
Before you can begin repairing your mobile home bathtub, you need to assess the extent of the damage. Start by inspecting your bathtub for any signs of cracks, chips, or other damage. You may also notice that your bathtub is leaking, which can be caused by a faulty drain or overflow.
Supplies You’ll Need
To repair your mobile home bathtub, you’ll need the following supplies:
- Epoxy putty
- Bathtub repair kit
- Sandpaper
- Paint or touch-up spray
- Protective gear (goggles, gloves)
Repair Techniques
Here are some DIY techniques that you can use to repair your mobile home bathtub:
- Repair small cracks and chips: If you notice small cracks or chips in your bathtub, you can repair them using epoxy putty. Start by cleaning the affected area with soap and water, then dry the area completely. Mix the epoxy putty according to the manufacturer’s instructions, then apply it to the affected area using a putty knife. Allow the putty to dry completely, then sand the area smooth and paint or use touch-up spray to match the color of the surrounding area.
- Repair larger cracks and holes: If you notice larger cracks or holes in your bathtub, you may need to use a bathtub repair kit. These kits typically include a patch, epoxy resin, and hardener. Start by cleaning the affected area with soap and water, then dry the area completely. Apply the patch to the affected area, then mix the epoxy resin and hardener according to the manufacturer’s instructions. Apply the epoxy resin to the patch, then allow it to dry completely. Sand the area smooth, then paint or use touch-up spray to match the color of the surrounding area.
- Fix a leaking bathtub: If you notice that your bathtub is leaking, you may need to replace the drain or overflow. Start by turning off the water supply to your bathtub, then remove the drain or overflow cover. Check the gasket or washer for any signs of wear or damage, then replace it if necessary. Reinstall the drain or overflow cover, then turn the water supply back on and test your bathtub for leaks.
Home Care Maintenance Blog
If you’re looking for more tips and advice on mobile home repair and maintenance, check out a home care maintenance blog. These blogs are a great resource for information on DIY mobile home repair, as well as general tips on keeping your home in top shape.
Summing up Mobile Home Bathtub Repair
A mobile home bathtub repair can be a complex and potentially dangerous process, but with the right tools and techniques, you can save money and keep your bathroom in top shape. Assess the damage, gather the necessary supplies, and consider contacting a professional if you’re not comfortable performing the repairs yourself. Don’t forget to check out a home care maintenance blog for more tips and advice on mobile home repair and maintenance. By staying on top of mobile home repair issues, you can keep your home safe, comfortable, and in great condition for years to come.
[youmightlike]