Got a tired old wooden planter?
Follow our guide to doing it up with a unique look.
When my old trellis planters started to look a bit weathered and worn I decided it was time to freshen them up a bit. I settled on a painted style but wanted to make them a little more unique for the garden. So I decided to give them a modern grey look but to then add stencilled images to the front to give them something a little extra. It’s safe to say I’m delighted with the outcome and there will be more stencilling going on in the garden soon!
How to paint a trellis planter
Here’s how the old planter looked, it’s bee outside for a couple of years and was looking a bit weathered.
IMAGE
Step 1 – Clean down
If you want it to look good give the planter a clean off and put it inside to dry out if it’s wet. Then just give it a quick rub down with some sand paper – I don’t mean get out the electric sander, just a light rub.
Step 2 – Repairs
If you need to fix any broken parts, tighten screws or fill any wood then now is the time to do it. Taking a little time on the cleaning up before you start painting will give you a much better, and newer looking, finish.
Step 3 – Painting
After looking at some colours I decided to got for the [easyazon_link identifier=”B01BSYC4F0″ locale=”UK” tag=”best3oe-21″]Cuprinol Silver Birch[/easyazon_link], this is a nice grey that is light enough to show up a black stencil.
It took 3 coats to cover the trellis sufficiently but you may get away with 2 depending on the quality of the wood and your painting skills. The trellis was quite tricky to paint just to make sure there were no runs or drips of paint coming off. So I stuck to thin coats and did 3 rather than taking any risks. The paint states you need to do all the coats on the same day but I found that the first one can be done anytime its just the next two that need to be on the same day.
Step 4 – Stencilling
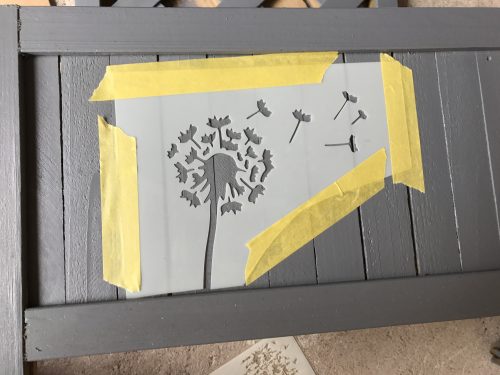
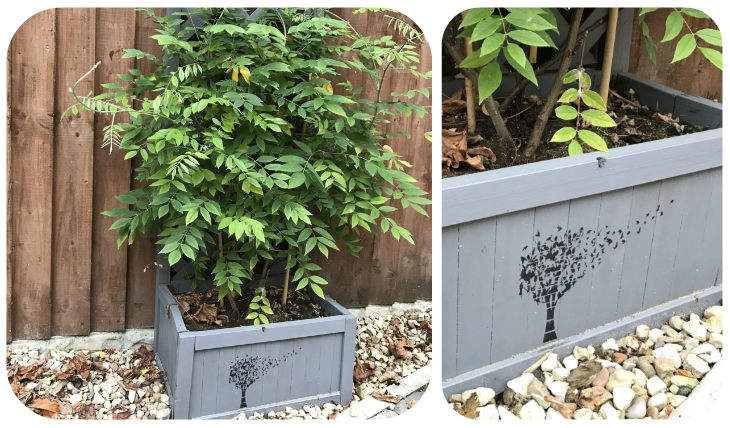
Once the paint was dry I set about doing the stencilling. This is not something I’ve done before so I spent 10 minutes on youtube getting some tips! (Stencilling 101 here). I’ve got 2 of these planters so I’ve gone for dandelions on one and a bird tree design on another. I did think the birds in the tree would be too small but it’s worked out perfectly.
I secured the stencil on with masking tape and slowly built up the layers of paint (I’ve used this – [easyazon_link identifier=”B06WP715FQ” locale=”UK” tag=”best3oe-21″]black acrylic paint[/easyazon_link] for them). This is again a task of taking your time and not rushing it to get the required result!.
Step 1 –
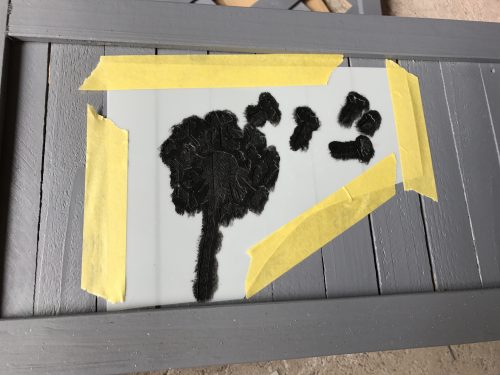
Step 2 –
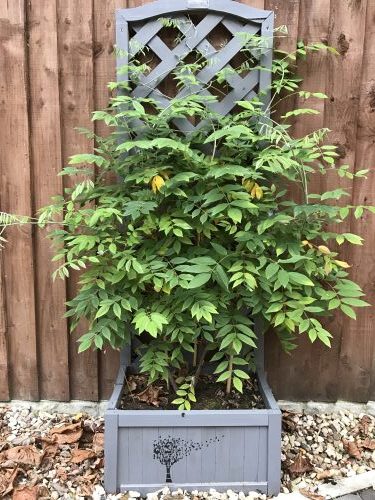
Here’s how the finished and planted dandelion planter looks –
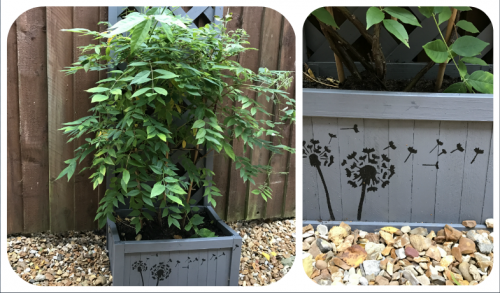
And here is my favourite, the birds leaving a tree stencil –
[youmightlike]